<body><script type="text/javascript"> function setAttributeOnload(object, attribute, val) { if(window.addEventListener) { window.addEventListener('load', function(){ object[attribute] = val; }, false); } else { window.attachEvent('onload', function(){ object[attribute] = val; }); } } </script> <div id="navbar-iframe-container"></div> <script type="text/javascript" src="https://apis.google.com/js/platform.js"></script> <script type="text/javascript"> gapi.load("gapi.iframes:gapi.iframes.style.bubble", function() { if (gapi.iframes && gapi.iframes.getContext) { gapi.iframes.getContext().openChild({ url: 'https://www.blogger.com/navbar/6984587?origin\x3dhttp://sfgourmet.blogspot.com', where: document.getElementById("navbar-iframe-container"), id: "navbar-iframe", messageHandlersFilter: gapi.iframes.CROSS_ORIGIN_IFRAMES_FILTER, messageHandlers: { 'blogger-ping': function() {} } }); } }); </script>

Friday, December 30, 2005

A Roadmap Of What's Ahead


In the six months that I've had this blog, the three most important lessons I've learned are:   (1) putting together any post takes three times as long as expected;   (2) the food-related experiences I have that are worth posting about occur at three times the rate at which I can actually write about them;   and (3) whenever my work or personal obligations flare up at all, the problems identified in the preceding two points are exacerbated by a factor of three.   Given the number of posts I wrote about my dinner party tour of the Bay Area's four-star restaurants, the significant increase in my personal commitments over the past six weeks due to the holidays, and the unexpected spike that simultaneously developed in my work obligations, I suppose it's little wonder that I only recently finished describing a dinner that was held at my home way back on November 10.

Since then, of course, a number of events have taken place, all of which I hope to post about.   First up will be my thoughts regarding Ame - the restaurant from Hiro Sone and Lissa Doumani that opened in the St. Regis Hotel in San Francisco back in November.   Because I visited the restaurant only once and on its third night in business, I will offer only preliminary reactions at this point rather than attempt to do a full-blown review.   I will then start another multi-post series - this one dedicated to the second major party I recently held at my home, an eight-course White Truffle Dinner.   In the interest of moving things along here, I'm going to skip the recipes and instead focus on providing descriptions and photos - both of the courses and of the event.   Next, I'll post about a special dinner that I enjoyed just a few days after I had finished presenting my White Truffle Dinner - a six-course white truffle dinner from Ron Siegel at The Dining Room at the Ritz-Carlton.   And finally, I hope to post some restaurant reviews that have been on my to-do list for weeks now - including one for Fleur de Lys.

So, stay tuned!

Tuesday, December 27, 2005

"Four Star Tour" Dinner: Closing Thoughts And Photos


This is the tenth and final installment in a series of posts directed to a holiday dinner party that I recently held at my home, for which I put together a six-course menu comprised of dishes inspired by the Bay Area's four-star chefs.   For more on the dinner, please see these posts:   Intro | Menu Planning, Pt. 1 | Menu Planning, Pt. 2 | Course 1 | Course 2 | Course 3 | Course 4 | Course 5 | Course 6 | Closing
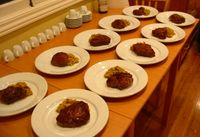
Having now described each of the six courses that I served as part of my November 12, 2005 dinner, I thought I would provide some closing thoughts and photos.   At the outset, I must acknowledge the enormous contributions of my co-host Rhonda.   She served as a sounding board while I planned the menu, as a taste tester when I ran experiments, as a co-chef while I cooked the meal, and as a gracious host to our guests whenever I was consumed in the kitchen.   Rhonda also took charge of the table décor, putting together the impressive spread depicted in the various photos included in this post.   To put it simply, I would not have been able to pull off this dinner party without her.

The pre-dinner preparation for the party went quite smoothly, and we felt much less harried than we typically do in the hours leading up to a multi-course dinner.   On Friday evening, I prepared the Leek & Corn Veloute up to the point at which the cream is added, and I prepared the lavender-infused juice for the Orange Lavender Cappuccino.   After a good night's rest, I went to the Ferry Building bright and early Saturday morning, where I purchased Prather Ranch steaks, Far West Fungi chanterelles, and a few other last-minute items.   Shortly after lunch, I quickly prepared the red onion crème fraiche and mixed it into the crab – tasting along the way to make sure that I had the right ratio.   In the middle of the afternoon, we started the Wild Mushroom Risotto;   in the late afternoon, we tackled the Apple Crisp.   As the afternoon wound down, a spectacular sunset visible out my dining room window served as a constant distraction from our cooking duties, and Rhonda paused more than a few times to capture some wonderful pictures.
~ ~ ~ ~ ~
There's more...
At around 6:00 p.m. – half an hour before our guests were to arrive and an hour before we expected the meal to start – I took the eggs out of the refrigerator to bring them to room temperature, cut up the mango and added it to the crab mixture, and loaded my iSi Gourmet Whip with some of the lavender-infused juice.   At 6:30, as my guests were starting to stream in, I took the pot with the partially-prepared soup out of the refrigerator, mixed in the cream, and placed the soup over very low heat to start to bring it up to temperature.   And after all of my guests had arrived, we poured some wine, I made a short welcoming toast, and I explained the theme of the evening's dinner.   From there, Rhonda and I set off to start the preparation of the first course – The Egg.

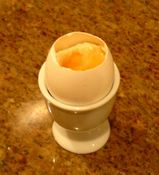
We decapped ten eggs and separated out the yolks, prepared the sherry vinegar whipped cream, and cut the chives.   After cooking and completing the eggs in two batches – and taking the obligatory pictures for this series of posts – we served the course to the table.   As I would do for each of the remaining courses, I talked a bit about the dish, the chef, and the restaurant – interspersing whatever anecdotes came to mind along the way.   As my guests tasted The Egg, a few of them commented that they had never before experienced such a unique combination of flavors – which was precisely the same reaction that I had when I first sampled this excellent dish at Manresa.

The Leek & Corn Veloute, meanwhile, slowly climbed up to the right temperature, and I left the table shortly after everybody had finished the first course so that I could make some final salt adjustments to the soup.   We cleared the table of the dishes from The Egg, divide the veloute among 10 bowls, and served the second course to our guests.   In our haste to do so, however, I forgot to take a picture of the soup – a fact I realized only after I had sat down at the table.   We accordingly scrambled to snap a picture tableside – which explains why the photo included in the post devoted to the veloute is different than all of the others!

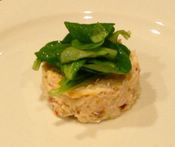
The Chilled Crab with Mango, Red Onion and Crème Fraiche was up next, so I lined up the appropriate plates on my "staging" table and took out my ring mold.   As Rhonda cleared the soup bowls from the table, I worked quickly to try to assemble the crab dish.   I put the ring mold in the middle of a plate, filled it with the crab mixture, slowly lifted the ring up, and then proceeded to repeat for the next plate.   The process took me some time to complete, during which Rhonda tossed the mache in our previously prepared dressing.   We quickly put a few mache leaves on top of each crab timbale and transported the dish to the table without too much delay.   As I sat there leisurely chatting with my guests over the crab, it suddenly struck me that I had better get up to finish the most time-consuming course of the evening – Filet Mignon with Wild Mushroom Risotto.

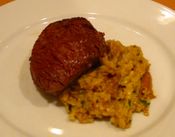
The first thing Rhonda did was to stir the previously-sauteed mushrooms into the pot containing the risotto and then place it over medium-low heat.   Meanwhile, I pan-seared the steaks in two batches, put them in a roasting pan, inserted a meat thermometer into one of them, and placed them into a preheated oven.   The steaks out of the way, we turned our attention to finishing the risotto and heating up the Bordelaise sauce.   When the steaks were done approximately ten minutes later, we removed them from the oven and immediately started plating the risotto.   We then put a steak on each plate and finished by topping it with a bit of Bordelaise sauce.   A picture or two later, and the fourth course was on the table.

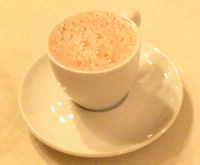
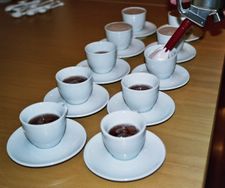
The fifth course, Orange Lavender Cappuccino, was easy to assemble.   I poured some of the lavender-infused juice into my ice cream machine, charged my iSi Gourmet Whip, and readied the demitasse cups on my staging table.   The juice was sufficiently slushy after about 10 minutes in the machine, so I put a few spoons’ worth in each cup, added some unfrozen juice, and then topped with a cap of foam.   The foam seemed to start dissipating almost immediately, so we rushed the cups to the table for maximum effect.   Miraculously, we managed to get a decent picture before the foam completely vanished.

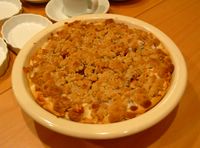
And that left the Apple Crisp with Vanilla Bean Ice Cream, another dish that was relatively easy to plate. We simply took the crisp out of the oven, sliced it into ten servings, and then placed them into small oval dishes.   We took a few pictures at this point, but we forgot to take additional shots after we had added a scoop of vanilla bean ice cream to each dish.   We wound up the evening at the table with some good conversation.

That brought us to my least favorite part of dinner parties like this – the clean-up.   With ten diners and six courses, I had sixty dishes to wash, well over sixty utensils, twenty glasses, countless pots, and innumerable spatulas, tasting spoons, and containers.   Worse still, all of these items had been more or less strewn about the kitchen as the evening progressed, since I didn't want to interrupt the flow of getting courses to the table in any way.   The net result – as depicted in the photo to the right – was complete chaos.   More than exhausted by this point, Rhonda and I resolved to postpone this final stage of the party until the next day – at which point we would cycle these various items through my dishwasher one load after another.

And that was it – the weeks of planning, the days of execution, and the hours of clean-up came to a close, and we finally had an opportunity to catch our breath.   But the respite would not last long.   My second major dinner party – a white truffle dinner – had been scheduled for December 10, 2005, and there was plenty of menu planning, cooking experimentation, and mental preparation to be done in the four short weeks remaining.   But more on that later.   For now, I will simply close with a pictorial recap of the six courses that comprised my "Four Star Tour" dinner.


Friday, December 23, 2005

"Four Star Tour" Dinner, Course 6:   Apple Crisp With Vanilla Bean Ice Cream


This is the ninth in a series of posts directed to a holiday dinner party that I recently held at my home, for which I put together a six-course menu comprised of dishes inspired by the Bay Area's four-star chefs.   For more on the dinner, please see these posts:   Intro | Menu Planning, Pt. 1 | Menu Planning, Pt. 2 | Course 1 | Course 2 | Course 3 | Course 4 | Course 5 | Course 6 | Closing

The dessert that I chose for my menu – Apple Crisp with Vanilla Bean Ice Cream – was, at first blush, incongruous with the rest of the meal.   An apple crisp, after all, is perhaps the quintessential comfort food dessert – perfectly appropriate after a dinner consisting of a hearty stew, or perhaps some fried chicken.   But it would seem to be somewhat out of place coming at the end of a dinner intended to reflect the cuisine served in four-star establishments.   And yet, in reality, this dessert was the perfect tribute to the chef who inspired it – Hubert Keller of Fleur de Lys.

Keller's knowledge of French cuisine is seemingly encyclopedic, and a quick look through his cookbook reveals that the inspiration behind his dishes is as likely to come from a traditional French country recipe as it is from a Michelin-starred chef with whom Keller once apprenticed.   But what's truly remarkable is how Keller draws upon and synthesizes these diverse influences, and then seamlessly incorporates a broad array of dishes and concepts into the rarefied setting of a four-star restaurant.   How many of the other four-star chefs would think to place an apple crisp on their menus?   Keller not only does so, but he does so with great success.

Keller's version of this classic dessert, however, is far from ordinary.   Rather than simply topping some baked apples with a flour-sugar-butter combination, Keller adds an interesting twist – phyllo dough.   The phyllo sheets, which sit along the bottom of the pie pan and partially fold over the sautéed apple filling, lend the finished dessert an extra component of flaky crispiness.   Thus, as Keller states in his cookbook, the dessert is really more a combination of apple strudel and streusel topping than it is a conventional apple crisp.
~ ~ ~ ~ ~
There's more...

Recipe, Tweaks, Tips and Techniques


Keller's original recipe is actually entitled "Cinnamon, Apple and Raisin Crisp with Blond Caramel Sauce."   Now, the very first decision that I made – almost without even thinking about it – was to toss the raisins overboard.   I don't have a problem with raisins per se;   I may eat some plain from time to time, and they are fine in certain cookies and breads.   But what I find inexplicable is that every time cinnamon is used as a primary flavor in a food item, raisins are almost guaranteed to be an automatic tag-along.   Why?   Even granting that their flavors work well with each other, are cinnamon and raisins forever more a package deal?   Well, I for one refuse to perpetuate this mandatory coupling in my kitchen!   In this instance, I really wanted the sautéed apples to have center stage all by themselves, so I saw no purpose to be served by the raisins.   And because I planned to serve the crisp with vanilla bean ice cream, I concluded that the blond caramel sauce – which is basically just cream, sugar, and a bit of water – was redundant and unnecessary.

Keller notes that the apple crisp can be served warm or at room temperature, which necessarily means that the dessert can be made slightly ahead of time and then simply held for service.   Thus, what I did was prepare the crisp late in the afternoon, held it at room temperature for a few hours, and then placed it in the oven at 250 F just as I was starting to put together the preceding course (the Orange Lavender Cappuccino).   By the time I was ready to serve the crisp a half hour later, it had attained the perfect temperature to contrast with the cold vanilla bean ice cream.   (I should probably confess here that although my original plan was to make vanilla bean ice cream from scratch, the press of time forced me to cheat and use a store-bought premium ice cream instead.)

Finally, a brief word on the number of servings that this recipe will yield.   It is certainly possible to divide the apple crisp into 12 equal portions – although if you do this, each serving will be on the somewhat smaller side.   If you divide the crisp into 10 portions, however, you will end up with generous servings.   Basically, just think about the typical 9" pie and how many servings you feel comfortable getting out it, and that should provide you with the appropriate guidance here.

The recipe set forth below is the one that I used the night of my dinner party.   You will not need any "specialized" equipment for this recipe:

Apple Crisp with Vanilla Bean Ice Cream
Inspired by Hubert Keller, Fleur de Lys

    Filling
  • 3 lbs. apples, half Granny Smith and half Golden Delicious, peeled, cut into quarters, cored, and then cut again into 1/8" slices (yielding approximately 16 slices per apple)
  • 1 T fresh lemon juice
  • 1 T butter
  • 5 T sugar
  • 1 T dark rum


  • Topping
  • ½ c flour
  • ¼ c sugar
  • ½ t ground cinnamon
  • 5 T chilled butter, diced into ¼" cubes


  • 8 sheets of 15" by 10" phyllo dough
  • 1½ T melted butter
  • 6 c premium vanilla bean ice cream

1.   Prepare filling:   Combine apples and lemon juice in a large bowl, and toss to mix well.   In a sauté pan large enough to hold the apples, heat the butter over medium high heat until melted.   Add the apples to the pan, and turn heat to high.   Cook for 5 minutes, stirring frequently.   Sprinkle sugar and then rum over the apples, stir to mix well, and continue to cook for 5 more minutes or until the apples are tender – stirring frequently along the way.   Remove the pan from the heat, and allow the apples to cool completely.

2.   Preheat oven to 375 F.

3.   Prepare the topping:   Combine the flour, sugar, cinnamon, and diced butter in a food processor and pulse until fully incorporated.   Refrigerate mixture for 15 minutes.

4.   Butter the bottom and sides of a 9" pie pan.   Take one sheet of phyllo dough, brush it generously with melted butter, and then place it into the bottom of the pie pan.   Note that because the phyllo is 15" long in one direction, two of the edges of the phyllo sheet will hang over the edge of the pie pan;   try to make the overhanging portions on the two opposite sides roughly equal.   Repeat the preceding steps with the second sheet of phyllo dough, but place it into the pie pan in a slightly rotated orientation so that the overhanging portions do not directly overlap the overhanging portions from the first sheet.   Repeat with remaining phyllo sheets, using slightly rotated orientation for each.

5.   Place the cooled sautéed apples in the pie pan and spread in a single layer.   Fold the overhanging edges of the phyllo dough over the sautéed apples.   Note that the phyllo will not cover the apples entirely, but will instead cover only the outer edge of the filling.   Bake in the oven for 20-25 minutes, or until the topping is lightly browned and the phyllo is golden.

6.   If serving immediately, cut into 10-12 slices, and serve each slice with ½ c of vanilla ice cream;   if serving later, set crisp aside and allow to cool to room temperature.   To reheat, preheat oven to 250 F, and place crisp in oven for 30 minutes.   Cut into 10-12 slices, and then serve each slice with ½ c of vanilla ice cream.    (Note:   If you make the crisp several hours in advance of service, you should refrigerate it rather than let it sit at room temperature for a prolonged period of time.   If you do refrigerate it, you will need to adjust the reheat time accordingly and/or bring the crisp back up to room temperature before following the reheat instructions set forth above.)

Yields 10-12 servings.


Wednesday, December 21, 2005

"Four Star Tour" Dinner, Course 5:   Orange Lavender Cappuccino


This is the eighth in a series of posts directed to a holiday dinner party that I recently held at my home, for which I put together a six-course menu comprised of dishes inspired by the Bay Area's four-star chefs.   For more on the dinner, please see these posts:   Intro | Menu Planning, Pt. 1 | Menu Planning, Pt. 2 | Course 1 | Course 2 | Course 3 | Course 4 | Course 5 | Course 6 | Closing

I have commented here many times about how the Bay Area's restaurant scene never sits still, with owners, restaurants, and chefs forever locked in a constant state of flux.   Well, before I could even finish posting about my dinner party "tribute" to the region's seven four-star chefs, one of them announced that he's leaving California altogether.   Daniel Humm - the youngest of the top-tier chefs and one of the brightest talents to hit the Bay Area in a long time - will spend his last evening at Campton Place on December 31.   He is then off to New York, where he will join famed restaurateur Danny Meyer's company and take over the kitchen at Eleven Madison Park.   This is obviously a major loss for San Francisco.

One of the things I admire most about Humm is his obvious penchant for innovation.   A meal at Campton Place under Humm was never ordinary, nor were his dishes ever likely to be confused for those served at any of the other four star restaurants.   No, Humm truly blazed his own path, regularly serving selections with unusual flavor pairings, unique preparations, interesting presentations, or all of the foregoing.   The Jasmine Orange Cappuccino I had on a visit to Campton Place back in October was one such offering.   An ice-cold slushy liquid - bursting with the bright flavor of citrus and the distinctive flavor of jasmine - was placed in a demitasse before being topped off with a frothy foam, mocking a conventional cappuccino.   The result was spectacular.   Indeed, there are only a small number of instances in my dining experience when the first taste of something really left an indelible impression on me;   this was one of them.

The variant that I chose for my menu, Orange Lavender Cappuccino, presented me with a few challenges.   The first, as mentioned in an earlier post, was what to use for my orange-flavored base.   After searching several grocery stores without any luck, I came across a promising solution - a Blood Orange Sparkling Grape Juice made by Gavioli.   One problem with this product, however, is that it is sparkling;   I didn't want my finished cappuccino to have any carbonation, nor was I sure what would happen if I placed a carbonated liquid into the high-pressure canister of a whipper.   It was at this point that my years of physics and chemistry classes paid off, as I realized that I could remove the carbonation by simply boiling the juice.   And because I had to boil the juice to infuse it with lavender anyway, I could achieve two goals at once.   The final challenge came when, having boiled out the carbonation and infused in the lavender, I discovered that the orange flavor was in danger of being washed out.   Luckily, I had a bit of orange extract on hand, which enabled me to bring the flavors into just the right balance.
~ ~ ~ ~ ~
There's more...

Recipe, Tweaks, Tips and Techniques


The recipe that follows is simple and requires little explanation.   You will note that I used two full bottles of the sparkling juice;   in actuality, you'll probably need only one and a half.   But fear not, the extra lavender-infused juice can be consumed as is or turned into a tasty sorbet.   If you have trouble finding an orange-flavored grape juice, I would suggest using a standard uncarbonated white grape juice, and then adding the orange flavor at the end through the use of orange extract and orange zest.

The recipe set forth below is the one that I used the night of my dinner party.   The "specialized" equipment referenced in the following recipe are an electric ice cream machine, an iSi Gourmet Whip, and demitasse cups:

Orange Lavender Cappuccino
Inspired by Daniel Humm, Campton Place

  • 2 bottles (750 ml each) sparkling orange flavored grape juice
  • ¼ c dried lavender
  • ¼ c sugar, more to taste
  • orange extract

1.   Pour sparkling juice into a large pot.   Bring to a boil, and continue to boil gently for 10 minutes.   Add sugar and lavender, and stir well.   Boil gently for 5 more minutes.   Remove pot from heat and cover.   Allow lavender to steep for at least 20 minutes.

2.   Pass mixture through fine-mesh strainer and discard solids.   Taste lavender-infused juice and add orange extract and/or sugar as needed or desired.   Place juice in airtight container and store in refrigerator until ready for use.    (Note:   These steps can be complete up to 1-2 days ahead of service.   In tasting the sugar level, keep in mind that the mixture will taste slightly less sweet when it is partially frozen.)

3.   Place approximately 300 ml of lavender-infused juice in iSi Gourmet Whip, and charge the canister according to the manufacturer's instructions.   Store in refrigerator until ready to use.

4.   Place 600 ml of lavender-infused juice into ice cream machine, and turn on according to manufacturer's instructions.   Place the remaining 600 ml of juice back in the refrigerator.   After 10 minutes, start checking the juice in the ice cream machine periodically, watching for when it reaches a "slushy" - but not completely solid - state.   When it does, turn off the machine.

5.   Divide semi-frozen juice from ice cream machine among 12 demitasse cups.   If necessary, use some of the unfrozen 600 ml of juice from refrigerator to fill each cup to a level just below the rim.   Top each cup with a cap of foam using the iSi Gourmet Whip.   Serve immediately.

Yields 12 servings.


Monday, December 19, 2005

"Four Star Tour" Dinner, Course 4:   Filet Mignon with Wild Mushroom Risotto


This is the seventh in a series of posts directed to a holiday dinner party that I recently held at my home, for which I put together a six-course menu comprised of dishes inspired by the Bay Area's four-star chefs.   For more on the dinner, please see these posts:   Intro | Menu Planning, Pt. 1 | Menu Planning, Pt. 2 | Course 1 | Course 2 | Course 3 | Course 4 | Course 5 | Course 6 | Closing

Among the seven four-star chefs, there is one who has done more than any other to broaden my understanding of what can be achieved through cuisine, to demonstrate what it means to pursue excellence with a passion that borders on obsession, and to exert the greatest influence on my own approach to cooking and dining, and that is Thomas Keller.   Alice Waters, meanwhile, can be fairly credited as being the founder of the entire culinary philosophy under which the other four-star chefs now operate, with cooking seasonally and using fresh, quality ingredients being the fundamental tenets.   Indeed, one could argue that if it weren't for Alice Waters, the craft that is today being plied by Keller and the others would look very different.   Thus, given the critical importance of Keller and Waters to the Bay Area's fine dining scene, it seemed quite fitting that creations from their respective restaurants would share a plate on my menu as the "main" course.

And yet, the specific selections that made it onto my menu - steak from The French Laundry, risotto from Chez Panisse - struck me as ironic on a couple of levels.   To begin with, neither dish is particularly difficult or groundbreaking;   indeed, one might argue that these items are actually out of favor in the Bay Area's four-star establishments, with steak in particular being quite rare among the entries found on the typical chef's tasting menu.   So, in effect, I had put together a menu on which two of the most important and influential chefs would be contributing two of the least complicated and least novel dishes.   Furthermore, because I had previously tried my hand at a number of recipes from Thomas Keller, I had no shortage of interesting and satisfying options from him from which to choose:   Cauliflower Panna Cotta, Corn Agnolotti, Salmon Cornets, White Truffle Risotto.   Yet, here I was, going with steak from a recipe - entitled "Yabba Dabba Do" no less - that I had never even tried before.   In the end, however, the simplicity of the steak and risotto dishes worked exceedingly well, as it showcased the ability of these talented chefs to achieve outstanding results almost exclusively through the use of high quality ingredients.

I knew that I wanted to purchase my steaks from a purveyor known for high-quality, hormone-free, humanely-raised beef.   The two names that immediately came to mind were Niman Ranch and Prather Ranch.   Niman Ranch, which maintains a stall at the Saturday morning farmers’ market at the Ferry Building, probably has a slight edge in terms of name recognition and representation on four-star restaurant menus, so my initial inclination was to go with them.   On the morning of my dinner party, I went to the Ferry Building, walked up to the Niman Ranch stall, examined the two perfectly-marbled and uniformly-shaped filets on display, and proceeded to ask for ten steaks.   As one visibly stunned guy started scrambling through large coolers and flipping through inventory sheets to determine how many filets they had on hand, his co-worker told him it was pointless given that they had loaded only four filets in the cooler that morning.   Now, I'm not entirely sure why a large and successful outfit like Niman Ranch does not have a permanent storefront inside the Ferry Building, but its "stall and cooler" method resulted in at least one lost sale that morning.
~ ~ ~ ~ ~
There's more...
I then walked over to Prather Ranch, which does maintain a storefront inside the Ferry Building.   Prather's beef is hormone-free and humanely-raised just like Niman Ranch's, but Prather apparently goes one step further and raises its cattle on nothing but organic feed and pure mountain spring water.   When I asked for ten filets, the guy behind the counter pulled out a large tray containing over twenty individually-wrapped steaks and invited me to pick whichever ten I wanted.   One unusual attribute of these filets was that they did not have the typical filet mignon "shape";   rather, they were somewhat thinner and had varying asymmetrical contours.   Because I needed to find steaks of similar thickness to ensure uniform cooking times and of similar shape for presentation purposes, I spent several minutes shuffling through the selections on the tray until I found ten to my liking.   When I told the guy helping me that I had never purchased from Prather before, he tossed in a free 1-pound package of their ground beef – proudly explaining how Prather uses only the finest cuts for its ground beef, how each package comes entirely from a single animal, and how Prather employs the highest standards in raising its cattle.   I have to say, I was impressed – with the company, with the service, and, ultimately, with the steaks and the ground beef.

I also needed to find some excellent chanterelle mushrooms for my risotto, and where better to look for these than just a few doors down from Prather Ranch at Far West Fungi.   The folks from Far West Fungi always have an incredible array of fresh mushrooms on display, and they did not disappoint on the day in question.   I picked up a couple of brown paper bags and filled them to the brim with incredibly large, beautiful, golden amber chanterelles.   As I stood there waiting to pay, a bag of Prather filets in one hand and a treasure of chanterelles in the other, I once again marveled to myself about what an amazing place the Ferry Building is.

Recipe, Tweaks, Tips and Techniques


The recipes that I used for this course are fairly straightforward.   The Thomas Keller recipe with which I started called for rib steak with Bordelaise sauce topped with chanterelles sautéed in butter;   the Chez Panisse recipe called for a relatively standard risotto into which a mix of wild mushrooms is incorporated.   In order to fuse the two recipes together while also indulging my preference regarding the cut of meat, I resolved to serve pan-seared filet mignon with Bordelaise sauce set atop a bed of chanterelle risotto.

In terms of the order in which to tackle this dish, the Bordelaise sauce should definitely be completed first and well ahead of service.   I would also recommend starting and nearly finishing the risotto shortly before guests arrive, leaving only the final stages of the cooking process for completion immediately before service.   And while the risotto is finishing up, the steaks can be cooked and prepared for plating.

The recipe set forth below is the one that I used the night of my dinner party.   The only "specialized" equipment referenced here are an electronic meat thermometer and a brush for cleaning mushrooms:

Filet Mignon with Wild Mushroom Risotto
Inspired by Thomas Keller, The French Laundry
and Alice Waters, Chez Panisse

    Bordelaise Sauce
  • 3 c red wine, such as Cabernet Sauvignon
  • 1 c sliced shallots
  • 1½ c sliced carrots
  • ¾ c sliced button mushrooms
  • 30 sprigs Italian parsley
  • 6 sprigs thyme
  • 3 bay leaves
  • 6 T sliced garlic
  • 18 black peppercorns
  • 3 c veal stock


  • Risotto
  • 8-10 c chanterelle mushrooms
  • 16 T unsalted butter
  • salt, to taste
  • pepper, to taste
  • 4 oz. shallots, finely diced
  • 3 c Arborio rice
  • 4 oz. pancetta, diced
  • 2 c dry white wine
  • 3 qt. chicken broth
  • 2 T chopped fresh Italian parsley
  • 2 t chopped fresh thyme


  • Filets
  • 12 beef filets
  • 12 T olive oil

1.   Prepare Bordelaise Sauce:   In a large pot, combine wine, shallots, carrots, mushrooms, parsley, thyme, bay leaves and garlic and heat to a simmer.   Simmer until nearly all of the liquid has evaporated, and then add the veal stock and the peppercorns.   Continue to simmer until the liquid in the pot is reduced to approximately 1½ cups (about 15-20 minutes).   Remove from heat, and then pass the mixture through a fine-mesh strainer.   Discard solids.   The sauce can be covered and refrigerated for 2 days.   (Note:   The original recipe states that the liquid, after cooking, should have a "sauce consistency";   in actuality, you may find your reduction to still be fairly "watery" – which is fine.)

2.   Prepare Risotto:   Clean chanterelles carefully and thoroughly under water, using a small brush if necessary to remove dirt.   Pat dry with paper towels, and slice mushrooms into bite-size pieces.   Melt 4 T of the butter in a large pan, and then add the chanterelles, salt, and pepper.   Cook the mushrooms until almost all of the water they give off has evaporated (approximately 10-15 minutes).   At the conclusion of this step, you should have roughly 4 cups of cooked mushrooms. Set aside.

3.   In a medium pot, heat the chicken broth to a temperature just below a simmer.   Adjust heat to maintain broth at this temperature.

4.   In a separate and larger pot, melt 4 T of the butter.   Add shallots and cook until translucent, approximately 4 minutes.   Add pancetta and rice, stir well, and continue to cook and stir frequently for another 4 minutes - taking care not to let the rice brown.   Add white wine, stir well, and then cook until the wine is almost entirely evaporated.   Add just enough of the hot chicken broth to bring the level of the liquid in the pot to just above the rice, and adjust the heat to maintain a gentle simmer.   Stir frequently as the rice cooks.   Whenever the liquid level drops – but before it has entirely evaporated – add more of the hot chicken broth, again bringing the level of the liquid in the pot just high enough to cover the rice.   Continue this process for approximately 15 minutes, until rice is nearly done (with a bit of firmness remaining only in the very center of each grain).   (Note:   The preceding steps can be done shortly before your guests arrive;   simply keep the risotto in the pot, off the heat, until just before service, at which point you can complete Steps 5-8 below.)

5.   Prepare filets:   Preheat oven to 400 F.   Heat 6 T of the olive oil in a large pan over medium heat.   When oil is hot, add 6 filets to pan and cook – without moving filets – for 3 minutes.   Flip filets over and cook for another 3 minutes.   Remove filets from pan and place in a roasting pan.   Repeat for other 6 filets.

6.   Identify a filet having an average thickness, and insert meat thermometer into the center of thickest part of that filet.   Place roasting pan in oven;   if possible, set the alarm on the thermometer to go off when the temperature of the filet reaches 145 F (for medium rare).

7.   Heat up Bordelaise sauce in a small pot, bringing to a temperature just below simmer.

8.   Resume/Finish Risotto:   Add the cooked chanterelles to the risotto, stir well, add hot broth to level just above rice, and cook at a gentle simmer for approximately 5 more minutes.   Add additional chicken broth as needed, tasting rice frequently for doneness.   When the center of each grain becomes slightly chewy rather than firm, stir in remaining 8 T of butter and mix well to incorporate.   Adjust salt and pepper.   Stir in chopped parsley and thyme and mix well.

9.   When filets reach internal temperature of 145 F (medium rare), remove roasting pan from oven.   Let filets rest on roasting pan for 5 minutes.

10.   Place small mound of risotto slightly off-center on each plate.   Using tongs, place filet on each plate such that one of the longer edges sits on top of risotto, while the opposite edge sits directly on the plate.   Top each steak with 1-2 T of Bordelaise sauce.   Serve.

Yields 12 servings.


Wednesday, December 14, 2005

"Four Star Tour" Dinner, Course 3:   Chilled Crab with Mango, Red Onion & Creme Fraiche


This is the sixth in a series of posts directed to a holiday dinner party that I recently held at my home, for which I put together a six-course menu comprised of dishes inspired by the Bay Area's four-star chefs.   For more on the dinner, please see these posts:   Intro | Menu Planning, Pt. 1 | Menu Planning, Pt. 2 | Course 1 | Course 2 | Course 3 | Course 4 | Course 5 | Course 6 | Closing

On my last visit to The Dining Room at the Ritz-Carlton a few months ago, I had the pleasure of sampling several extraordinary creations from executive chef Ron Siegel.   One of these was the Chilled Crab, a timbale comprised of champagne mango and red onion compote as its base and lump crabmeat sitting above it.   Lightly dressed microgreens were set atop the crab, and drops of shiso oil decorated the perimeter of the plate.   The flavors melded together beautifully.   I unfortunately have never seen a recipe for this spectacular dish, nor am I entirely sure what Siegel put into his delicious compote or how he seasoned his crab.   But given how much I enjoyed this item at the restaurant, I was excited to try to create something similar for my menu.

From the first time I sat down to think about how to compose this dish, I had an urge to add something that Siegel's version did not include:   crème fraiche.   I wasn't exactly sure where this idea came from or why I felt so strongly about it, but I ultimately decided that there was no reason to fight it.   And so I began the process of figuring out a way to combine crab, mango, red onion and crème fraiche into something that would be satisfying.

My first thought was to put a mixture of red onion and diced mango in the bottom of a ring mold, top it with a thin layer of crème fraiche, and then top that with some crabmeat.   But as I tried to visualize this, it occurred to me that it might be a challenge to make the layer of crème fraiche look uniform and unmessy.   To get around this, I considered putting the red onion and mango mixture on the bottom, crab immediately above it, and then a dollop of crème fraiche sitting on top.   Although this had the potential of being visually appealing, my fear was that the flavors would not be integrated enough.   In other words, I didn't want my guests taking bites with no crème fraiche, nor did I want them taking bites with too much crème fraiche.   That led me to the obvious solution of mixing the crème fraiche into the crab - a rudimentary crab salad of sorts that could then sit on top of the red onion and mango mixture.
~ ~ ~ ~ ~
There's more...
Figuring that I had the basic structure down, I then began thinking about the relative proportions of the four ingredients.   How much mango per ounce of crab?   How much crème fraiche per ounce of mango?   How much red onion per ounce of crème fraiche?   And with this last question, I suddenly recalled a conversation that I had had with my good friend and co-worker "A" a few months earlier.   You see, A and I are both big fans of the Thomas Keller amuse bouche known as the Salmon Cone, and on the day in question, A and I were sitting in my office enjoying a batch that A had whipped up at home the weekend before.   As I bit into the buttery, black-sesame-laden cone and tasted the lemon-oil-punctuated salmon set off against the cool, red onion crème fraiche, I jokingly said "you know, you could probably put this red onion crème fraiche on anything and make it taste delicious."   Well, I thought, why not use Keller's recipe for guidance on the ideal ratio of red onion to crème fraiche in the context of the crab dish that I was trying to put together?   Better yet, why not use Keller's red onion crème fraiche itself, and mix it directly into the crab?   And once that's done, why leave the mango out on its own - why not mix that into the crab as well?

At this point, I felt that the basic dish was done, but I wanted to add some greens on top to follow Siegel's original dish more closely.   I have yet to find a good source for the type of microgreens that the top-tier restaurants use, so I opted instead for one of my favorite regular greens - mache.   I wanted a dressing that would be light and bright, so a citrus component struck me as being appropriate.   On a visit to the Ferry Building farmers' market a few weeks before my party, I happened upon a delicious Lisbon Lemon Olive Oil from Stonehouse, as well as an equally tasty White Balsamic Vinegar from the same company.   A dressing made from the two of these, I surmised, would be exactly what I was looking for.

Recipe, Tweaks, Tips and Techniques


The recipe that I used for the Chilled Crab dish on my menu is not at all difficult, but there are a couple of tips that I can pass along.   First, unless you have a lot of time on your hands and a great deal of patience, buy cooked lump crabmeat from your favorite store rather than trying to cook it yourself.   Second, mix the crab salad before your guests arrive;   it can sit in the refrigerator for quite some time without any adverse effect on its flavor or texture, and mixing it in advance will save you a lot of stress and time.   And finally, keep in mind that personal preferences can vary regarding the ideal amount of red onion crème fraiche and/or mango to be blended into the crab, so adjust these according to your own tastes.

The recipe set forth below is the one that I used the night of my dinner party.   The only "specialized" equipment referenced in the following recipe is a 3" by 1.5" ring mold:

Chilled Crab with Mango, Red Onion & Crème Fraiche
Inspired by Ron Siegel, The Dining Room at the Ritz-Carlton


  • 1 1/2 lbs. cooked, shelled lump crabmeat
  • 2 7.5 oz. containers crème fraiche
  • 4 T finely minced red onions
  • 1-2 large mangoes, skin removed, cored, and finely diced (1/4" cubes)
  • salt, to taste
  • white pepper, to taste


  • 3 oz. mache
  • 3 T Lisbon Lemon Olive Oil (or other lemon flavored olive oil)
  • 1 T White Balsamic Vinegar
  • 1/8 t Dijon mustard
  • 1/4 t salt, or to taste
  • 1/8 t freshly ground black pepper, or to taste

1.   In a small bowl, combine crème fraiche and red onion.   Mix well.   Add white pepper to taste;   add salt until detectable when tasted, but do not salt fully at this stage.

2.   Place crab in a large mixing bowl.   Add one half of crème fraiche mixture and stir well with a fork.   (Note that this process of stirring may break apart some of the bigger pieces of crab, which is actually fine.)   Taste crab mixture, and add additional crème fraiche as desired.   (I ended up using approximately 3/4 of the crème fraiche mixture with which I started, but you may prefer more or less.)   Add salt to taste.   Stir in diced mango from first mango;   add additional diced mango to taste.   (I used only one mango, but you may prefer more.)   Cover and refrigerate until ready to use (up to 12 hours).

3.    Prepare vinaigrette:   whisk vinegar, mustard, salt and pepper together in a small bowl.   Slowly whisk in the olive oil in a thin, steady stream until well blended and emulsified.   Cover and refrigerate.

4.   To serve, place 3" by 1.5" ring mold in center of plate.   Place approximately 3 oz. of crab mixture into ring mold, and press down gently with back of spoon so as to create a flat top surface.   (Note that the crab will not completely fill the ring mold.)   Gently and slowly lift the ring mold, while pushing the crab mixture down (especially in the areas nearest the inside of the ring) with the back of a spoon.   Repeat for other plates.

5.   Place mache in mixing bowl.   Add dressing to taste and toss.   (Note that you will likely have a good amount of extra dressing left over.)   Place approximately 1/4 oz. of dressed mache on top of crab.   Serve.

Yields 12 servings.


Wednesday, December 07, 2005

"Four Star Tour" Dinner, Course 2:   Leek & Corn Veloute


This is the fifth in a series of posts directed to a holiday dinner party that I recently held at my home, for which I put together a six-course menu comprised of dishes inspired by the Bay Area's four-star chefs.   For more on the dinner, please see these posts:   Intro | Menu Planning, Pt. 1 | Menu Planning, Pt. 2 | Course 1 | Course 2 | Course 3 | Course 4 | Course 5 | Course 6 | Closing

As I think back to my many visits to La Folie over the years, I can't think of a single instance in which my meal did not include an outstanding soup.   Indeed, one of my earliest memories of being astounded by how a simple broth could be transformed into something spectacular was at La Folie, and that may very well explain why Roland Passot and soups have become virtually synonomous in my mind.   Yet, despite my great affinity for this ubiquitous appetizer, I surprisingly did very little exploration in this regard in my own kitchen until I started toying with the idea of multi-course dinner parties.   In that context, soups are a godsend;   they can be prepared almost entirely in advance, they can be heated up easily right before service, and they can nicely showcase the flavor of the chosen ingredient.   So, in light of all of the above, it was hardly an accident that I chose Roland Passot's Leek and Corn Veloute as the second course for my recent dinner party.

Although soups can be made in nearly as many textures as they can flavors, cream soups have long been my favorite.   There's something decadent about a good cream soup, the flavor of the underlying ingredients delivered through an ultra-smooth and utterly rich medium.   It goes without saying, of course, that the success of a cream soup is necessarily dependent upon the quality of the component ingredients.   But, in my experience, there are two particular steps in the preparation of a cream soup that are equally critical to an outstanding result.

First, it is imperative that the soup - after being run through a food processor - be passed through a chinois or other fine-mesh strainer.   The simple reality is that no food processor, blender, hand blender or other device is going to liquify everything, and the last thing you want is to have small bits of solids detracting from the otherwise velvety texture of your soup.   One technique that I have found useful is to run the soup through a food processor, place it in a chinois, and then use a hand blender - plunged right into the chinois itself - to pulverize the soup further and permit more of it to pass through.   The benefit of doing this, of course, is a soup with a truly uniform texture, which becomes all the more luxurious with the subsequent addition of cream.

Second, as is true with many foods, it's critical that the soup be salted properly.   Because salt is a flavor enhancer, an improperly seasoned soup will come across as dull, while a properly seasoned one will be vibrant.   Hitting the optimal salt level, however, is anything but easy, and the only way to develop this skill is seemingly through extensive experience and constant tasting.   It's also important, of course, to always add salt slowly and incrementally, to make sure that you don't end up overshooting the target.
~ ~ ~ ~ ~
There's more...

Recipe, Tweaks, Tips and Techniques


Roland Passot's recipe for Leek & Corn Veloute is included in The Secrets of Success Cookbook - a compilation of recipes from the Bay Area's most popular restaurants, put together by Michael Bauer (the lead food critic for the San Francisco Chronicle).   Because Bauer obtained the recipes from the chefs themselves, the cookbook generally yields results that are faithful to the original dishes.   Yet, when I looked at the recipe for Leek & Corn Veloute, there were two things that struck me as unusual and potentially worth modifying.

First, most soups of this sort call for sauteeing the vegetables, adding chicken broth, pureeing, and adding cream - in that order.   Passot, however, indicates that the cream should be incorporated shortly after the vegetables have been sauteed - before the chicken broth has even been added.   Moreover, he also states that the cream and vegetable mixture should be brought to a boil before the chicken stock is added, and that the entire soup should be brought to a boil again afterward.   Perhaps this is just a personal idiosyncrasy, but I always get a little leery at the prospect of bringing heavy cream to a full boil.   Seeing no good reason to depart from the sequence that I am accustomed to using, I decided to flip the order of the cream and chicken stock steps - and to skip entirely the part about boiling the cream.

Second, most cream soups that I have prepared use a stock to cream ratio of 2 to 1.   Passot's recipe calls for a ratio of 1 to 1 - meaning that his finished soup will be extra rich and creamy, but the flavor of its components will be significantly more diluted.   I wrestled with what to do on this point, but in the end I decided to go with my gut and use the seemingly more standard ratio of 2 to 1.   And I'm glad that I did, because the flavor of the finished product would have beem markedly diminished had it been diluted in extra cream.

The final change that I made to the original recipe was to skip the sauteed rock shrimp that Passot suggests should be placed on top of each bowl of soup.   Not only did I prefer the idea of presenting the unfettered flavor of leek and corn, but skipping the shrimp also enabled me to avoid the real-time task of sauteeing.

The recipe set forth below, which reflects the modifications that I made to the original, is the one that I used the night of my dinner party.   Note that the recipe yields around 5 cups of finished soup, which is enough for 4-6 regular servings.   When I do a multi-course menu, however, I normally serve only a half cup of soup to each diner - so this recipe was perfect for my dinner for 10. The "specialized" equipment referenced in the following recipe includes a chinois and a hand blender:

Leek & Corn Veloute
Inspired by Roland Passot, La Folie


  • 1/2 c unsalted butter
  • 5 shallots (about 1/2 lb), chopped
  • 4 leeks (white part only), cut in half lengthwise, thinly sliced and washed
  • 3 ears of corn, kernels cut off
  • 1 c extra-dry vermouth
  • 2 c heavy cream
  • 4 c chicken stock
  • salt and white pepper to taste

1.   In a large pot over medium heat, melt the butter.   Add leeks and shallots, and saute for approximately 5 minutes (or until the leeks and shallots have become translucent).   Add the corn, and cook for approximately 15 minutes while stirring periodically.

2.   Add the vermouth to the pot and bring to a boil.   Continue to cook for about 10 more minutes, until the vermouth has reduced by half.   Add the chicken stock and bring to a boil once again.   Reduce heat, and maintain mixture at a simmer for approximately 10 more minutes.

3.    Working in batches if necessary, puree the mixture thoroughly in a food processor.   Transfer the puree to a chinois or other fine-mesh strainer, and then pulverize the puree further by using a hand blender (submerged into the mixture as it sits in the chinois).   Note that the soup can be made up to this point and then stored, covered and in the refrigerator, for up to 1 day.

4.   Return soup to clean pot.   Add cream, and stir well to incorporate fully.

5.   Reheat soup gently and gradually, taking care not to let soup boil.   Season with salt and white pepper to taste.   Serve.

Yields approximately 5 cups, enough for 4-6 regular servings.


Saturday, December 03, 2005

"Four Star Tour" Dinner, Course 1: The Egg


This is the fourth in a series of posts directed to a holiday dinner party that I recently held at my home, for which I put together a six-course menu comprised of dishes inspired by the Bay Area's four-star chefs.   For more on the dinner, please see these posts:   Intro | Menu Planning, Pt. 1 | Menu Planning, Pt. 2 | Course 1 | Course 2 | Course 3 | Course 4 | Course 5 | Course 6 | Closing

As I thought about the various items that I had selected for my menu, there was no question in my mind about which should come first:   The Egg, as served by David Kinch at Manresa.   The components of this dish are few and the preparation is relatively straightforward:   an egg yolk that has been soft-boiled in its shell is topped with minced fresh chives, sherry vinegar whipped cream, sea salt, black pepper, and maple syrup.   Yet, despite this simplicity, the flavor combination is truly tantalizing, and the serving size is just small enough to leave the diner craving more.   In other words, it's a perfect selection for whetting the appetite, which probably explains why Kinch serves it as an amuse bouche to every table at the restaurant.

Now, some might legitimately ask whether The Egg is a good choice to represent David Kinch on my menu.   After all, the dish was created by chef Alain Passard at L'Arpege in Paris, and Kinch merely replicated it for service in his Los Gatos restaurant.   But after giving this some thought, I concluded that the provenance of The Egg was of little import.   What mattered to me was that Kinch recognized its appeal, he figured out a way to incorporate it seamlessly and prominently in his cuisine, and he has managed to introduce thousands of Bay Area diners to a spectacular appetizer that many would never have experienced otherwise.   And as one prominent food blogger has noted, Kinch provides full attribution for the dish whenever he is asked - so it's not as though he's trying to pass it off as his own creation.   Finally, all cooking is ultimately comprised - to one degree or another - of ingredients, combinations and techniques that are already known, so trying to limit my menu to purely original creations from the four-star chefs would be an exercise in futility.
~ ~ ~ ~ ~
There's more...

Recipe, Tweaks, Tips and Techniques


It didn't take much effort to find a recipe for The Egg online, but a few of the instructions set forth there seemed to be potentially problematic.   First, the original recipe suggests cutting off the top of each egg with an egg topper, and then pouring out the white while keeping the yolk in the shell using the flat side of a knife.   This technique, however, seems to leave behind some of the white, and that can adversely impact both the taste and consistency of the egg after it has been soft-boiled.   To avoid this, I poured the entire contents of my decapped egg into an egg separator, rinsed out the inside of the shell, and then returned only the yolk to its shell.

Second, the original recipe suggests soft-boiling the decapped eggs by placing them in a single layer in a large shallow skillet with 2 inches of simmering water.   This struck me as a rather precarious arrangement, the risk being that one or more of the eggs will tip over and take in some water.   Here, a friend of mine came to the rescue, as she had just purchased a small appliance made by Salton specifically for boiling and poaching eggs.   While I'm not sure that this device offers any significant advantage over a simple pot of water when it comes to cooking whole eggs, it's perfect for cooking decapped ones due to its integrated egg holder.

The recipe set forth below, which reflects the minor modifications that I made to the original, is the one that I used the night of my dinner party.   Note that the specialized equipment needed here includes an egg topper, an egg separator, the Salton Egg Poacher (or other similar poacher), and 12 egg cups:

The Egg
Inspired by David Kinch, Manresa


  • 12 fresh eggs, room temperature
  • 1/2 c heavy cream
  • 1 1/2 t sherry vinegar
  • 4 t finely minced fresh chives
  • 4 t maple syrup
  • sea salt, to taste
  • freshly ground black pepper, to taste

1.   Hold egg on flat surface with the smaller end facing up.   Using egg topper, cut off top third of shell and discard.   Empty contents of egg into an egg separator, reserving whites for another use.   Rinse out empty eggshell, shake out excess water, and use paper towel to dry exterior of shell.   Return yolk to empty shell, and place shell in an egg cup.   Repeat with remaining eggs.   (Note:   There is a good chance that one or more of your eggs will not make it out of this process in presentable shape, so it's a good idea to have a few extra eggs on hand.)

2.   In a bowl, whisk the heavy cream until soft peaks form.   Whisk in the sherry vinegar and season with salt.   (Note:   Be careful not to salt too heavily, as there will be salt added directly over the soft-boiled yolk in a later step.)

3.    Place water in Salton Egg Poacher (or similar device), following the manufacturer's instructions for soft-boiling eggs.   Place 6 eggs in the device and turn on.   Cook eggs until yolks just start to set around the edges - approximately two minutes.   Remove eggs from device and return to egg cups.

4.    Place water and remaining 6 eggs in Salton Egg Poacher (or similar device) and turn on.

5.   While the second batch of eggs is cooking, sprinkle each of the cooked yolks from the first batch with minced chives, and then season to taste with freshly ground black pepper and sea salt.   Spoon sherry vinegar whipped cream into each shell, filling to a level approximating the edge of the egg cup.   Drizzle with maple syrup.

6.   Repeat step 5 for the second batch of 6 eggs after they have finished cooking.   Serve immediately.

Serves 12.